Sunday 26 September 2010

ANY COLOUR YOU LIKE AS LONG AS IT'S...... GREEN. (Sorry Henry !)


Started painting this week. Not withstanding being painted directly over bare metal and rust whoever painted the mower last did a fair job as it was not painted whilst assembled. Not a single part was stuck to another by dried paint so it must have been completely dismantled just as I’m doing.  There’s more pressing work that needs doing other than painting but like lacquering it’s essential the painting of component parts is completed before the winter sets in. I’ve learnt from experience that although paint can be touch dry in  a day or so and allegedly ‘fully’ dry in 3/4 days the reality is that oil based paint simply does not go rock hard for several weeks-if not months- especially in a cold, wet environment. (As in my garage!) When the time comes for final reassembly I don’t want to be smudging paint that hasn’t fully cured.

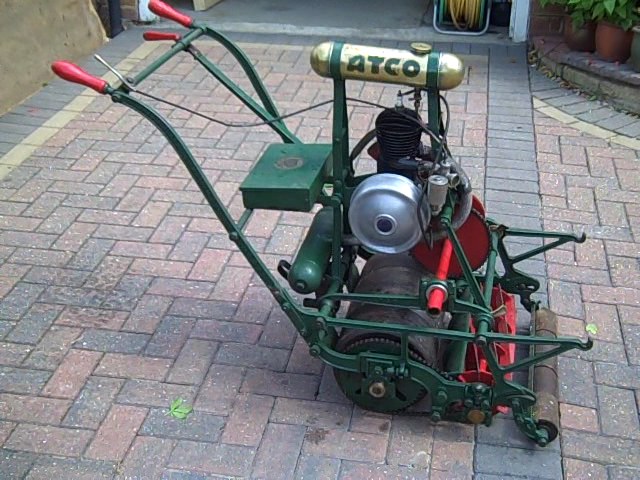
After weeks of deliberation I’ve decider on a colour. This has been another nail biting issue. Firstly a lawnmower should be green. I’ve seen restored machines in other colours and as good as they are they simply don’t look ‘right’. Choosing a colour is subjective, personal as well as confusing as there are simply too many shades and what looks correct on a colour card may not be right when seen in the whole.   Anyway I’ve opted for RAL 6005 moss green oil based gloss. Fingers crossed it will look acceptable on the end product. Absolute originality is not that important here as I understand Atco used whatever shade of green was available at the time and this varied.
It’s a good job we restorers don’t cost our time. Irrationally I’ve spent the past few days stripping the non original red paint off the handles. It’s so ingrained that no amount of paint stripper and wire brushing will shift it. So after at least ten hours work-all for nothing- I’ve decided to have new handles turned. And whilst I’m about it I’ll also have new oak front rollers made as the existing ones are rotten and split.

 I’ve made a new tool box. There was nothing wrong with the old one-it just looked shabby. I’ll use the existing lid but bought a strip of white oak to make the box. I’ve yet to decide what transfer to stick on the lid.  Straight forward job. Old and new in the photo.
I also fully restored the starting handle. Fortunately the oak wooden handle was sound albeit ingrained with oil and dirt but that was simply sanded back to clean bare wood and then brushed with three coats of  yacht varnish.


  Although I bought a set of new Whitworth spanners specifically to use on this restoration I’ve also purchased a complete set of period pre WW1 AF spanners complete with original spring clip all in virtually unused condition. Along with an old brass oil can I think these look the part in the new tool box.


Friday 24 September 2010

MAY CONTAIN NUTS


 It’s my objective to restore this machine to as close to original as possible. Every restored Atco Standard I’ve seen, however good, have the nuts, bolts, fasteners etc painted over when the frame is repainted. I stand corrected but I cannot see how when assembled new all the fixings were anything other than bare metal. Accordingly I propose replacing all the existing painted fasteners with new which will be left bare but lacquered. That said I’ve discovered that most if not all the bolts and nuts have oversize heads, eg modern ½” BSW nuts have an across flats dimension of 0.82” (13/16”) whereas on the Atco the nuts are 1” AF and also deeper.  I can’t trace any new nuts this size so today I’ve stripped, polished and lacquered all the large ½” bolts and nuts but will buy new for the remainder as the AF difference on the smaller sizes is minimal. And yes I appreciate that as soon as these nuts are tightened on final assembly they will have to be lacquered again!   

Display or use ? Today I’ve made a major decision. I’ve been losing sleep over this ever since I bought the machine !  The restoration will be solely for display / exhibition purposes and not for use. Accepting the oily rag purists will disagree but my thinking goes like this.
1)      Although a lawnmower this contraption could easily be mistaken for an ancient war machine !  Five drive chain wheels and cogs are all fully exposed to fingers and loose clothing, the hot engine, exhaust pipe and silencer are all unprotected, the countershaft and sharp starting socket is a rotating dagger and worst of all the unprotected fan wouldn’t be out of place in a Roman chariot race ! Put simply this Atco is a serious injury waiting to happen. I’m not taking the risk.
2)      Every moving part –most of which are fully exposed- has to be oiled or greased, the drive chains being a good example. At best this will coat the entire machine in a fine film of oil as soon as the mower is started. This in turn will act as a magnet for grass clippings, soil and all manner of debris thus defeating the object of keeping the mower solely for display purposes. BUT, and just for the record when the restoration is complete I will have the machine run if only for a few seconds so at least I can say “it works”.


Wednesday 22 September 2010

THE SHINING

Today I’ve been rubbing down, polishing and lacquering all the ‘shiny bits’.  This would normally be one of the last jobs in the project but there’s a method in my madness. Today has been warm and dry, ideal weather conditions for lacquering. I’ve learnt from past mistakes that lacquering during the-coming- cold damp winter leaves a bumpy, dull finish which doesn’t dry to an acceptable gloss.  I’m fairly happy with the results but the petrol tank may have to be done again. Wadding and polish will give a better finish than lacquer on brass but tarnishes after a few months if not regularly polished. The slightly less shiny lacquered finish should last a lot longer.
For the record the petrol tank, fuel lines and carb were full of all manner of debris. No wonder the machine had difficulty starting and ran lumpy. All now thoroughly cleaned out.

Sunday 19 September 2010

DIRTY VIDEOS

The past couple of days have been spent dismantling and the machine is now in bits packed into boxes with identifying labels. As each part was removed I made a sketch of the more complex assemblies to aid reassembly. And just for good measure I also took close up videos during dismantling. What's obvious when taking something apart is easily forgotten six months later. My camera and note book are covered in the oil and filth from handling these parts whilst simultaneously filming.  The plan is to clean/polish/paint/and generally restore every component part separately and pack away ready for final assembly in Spring 2011.


 First problem and only one so far was removing the cylindrical silencer. As the fixing bolts were turned so the nuts inside the silencer also turned. Like the fuel tank I had assumed the silencer was a single unit sealed at the seams. It just didn’t occur to me that the hemispheres at the end of the cylinder could be twisted off to gain access to the nuts inside. Thanks to those club members who put me right. A classic case of ‘everything is simple…. when you know what you’re doing !’  

 As I come to prepare each component there is still grease and oil in every nook and cranny- I’m now on the third can of Gunk!
The painted parts are being degreased, lightly sand blasted to etch the surface, rubbed down with wet&dry and then coated with Kurust prior to painting.  At some stage the frame must have been painted with gloss straight over the existing gloss paint or bare metal/rust and inevitably this is now flaking off.  Update. My sandblaster is an attachment to a pressure washer. They’re useless !  The suction end goes into a bag of kiln dried sand and the high pressure water flow through the gun sucks the sand to the end of the outlet nozzle. At least that’s the theory. In practice the sand in the tube at the nozzle end is continually getting damp, clogging and stopping the flow. The DIY forums I’ve searched all report the same problem and I note that all the major manufacturers of domestic pressure washers have now discontinued this accessory. Back to using a wire brush and elbow grease.

Wednesday 15 September 2010

FIRST IMPRESSIONS


After a thorough inspection I noted all the obvious work required and drew up a plan of action. I then took a lengthy video from every possible angle because I just know that on final assembly I’ll be wondering “where does this go ?”  The entire machine was covered in grease and oil which, as I was to discover later meant that whilst every nut, bolt and fixing came undone with ease on the minus side it made it almost impossible to get a grip on anything. So the first job was to saturate the machine in Gunk, then brush in neat washing up liquid followed by an hour of pressure washing.

Although the updates that follow are sequential I will not be undertaking all the separate tasks to completion in one go to avoid boredom and fatigue setting in.  In other words I will spend my days alternating between say preparing & painting some parts for an hour or so whilst also attending to mechanical and other issues.  

Tuesday 14 September 2010

BEING TAKEN FOR A RIDE

This is a photo of the Atco as a ride-on. I have no idea if this attachment was an available extra when the mower was new or indeed if it was made by Atco. The castings and general construction are identical to the mower albeit without raised lettering on the side bars, only numbers. This  leads me to believe it is original although the fixing brackets are a bit of a bodge and definitely later. Whatever, the attachment will be restored along with the mower.

TIME FOR MEN IN WHITE COATS ?

 ME:  Roy (roythegrass), semi retired, live in Epsom, own a lawn mowing contracting business which for most of the year virtually runs itself so I get the time to devote to various restoration projects.  Just finished restoring an old Citroen 2CV up to near concours, previous eclectic restorations include various old penny arcade slot machines, one arm bandits, all the fittings and fixtures for an Edwardian loo and other miscellaneous collectables including several classic cars.  Despite having continual problems with modern machines we use in the business I’ve now embarked on restoring a vintage lawn mower just for the challenge it presents. I must have lost the plot! So no more waffle and down to business.

THE PROJECT / OBJECTIVE: A 1920’s Atco Standard 16” cylinder lawn mower. Working (just about), fair to good when purchased, restore it to exceptional / as new condition and eventually offer it to a museum, for display at say a golf club or auction it with funds going to cancer research UK. (I’m in remission after 10 years!) 

KISSING A LOT OF FROGS TO FIND THE PRINCESS.  I viewed numerous machines online but they were virtually all non runners and seized rust heaps where the amount of work required would exceed my available time. Having learnt from mistakes in my early days I always plan any project to be completed within a given time scale failing which the enthusiasm wanes or I get overtaken by other events. In this instance I have ‘till March next year to complete the restoration as by then I have to concentrate on my business.
The machine I eventually purchased is shown in the photo. No grassbox but adapted as a ride-on.  Yes it looks fine in the photo but the camera does lie because on close examination quite a lot of work needs to be done (understatement!) to get it up to the standard I expect.

ATCO STANDARD RESTORATION Autumn/winter 2010 / 11

ATCO STANDARD 16" CYLINDER LAWN MOWER RESTORATION Autumn / Winter 2010 / 11

The irascible 'roythegrass’ views the world through his workshop doors while attempting to restore a 1920's vintage Atco!

PREAMBLE: Whether you are experienced in the restoration of these machines or, like me, an absolute newcomer I should apologise for the sparsity of technical info in my posts as these ramblings only reflect my day to day experiences and frustrations during this restoration and I’m learning on the job.
I will be updating this blog once a week, usually on a Sunday evening but probably more often depending on progress.